
JavaScript Calculator: Build a simple calculator with HTML, CSS, and JavaScript.
Build a simple Calculator using JavaScript, HTML and CSS


This is going to be an epic blog where you’ll learn how to build a calculator from scratch with HTML and CSS, and JavaScript! Here’s a quick demo👇
This is a fun project and you’ll learn a lot about JavaScript classes. So let’s get started!
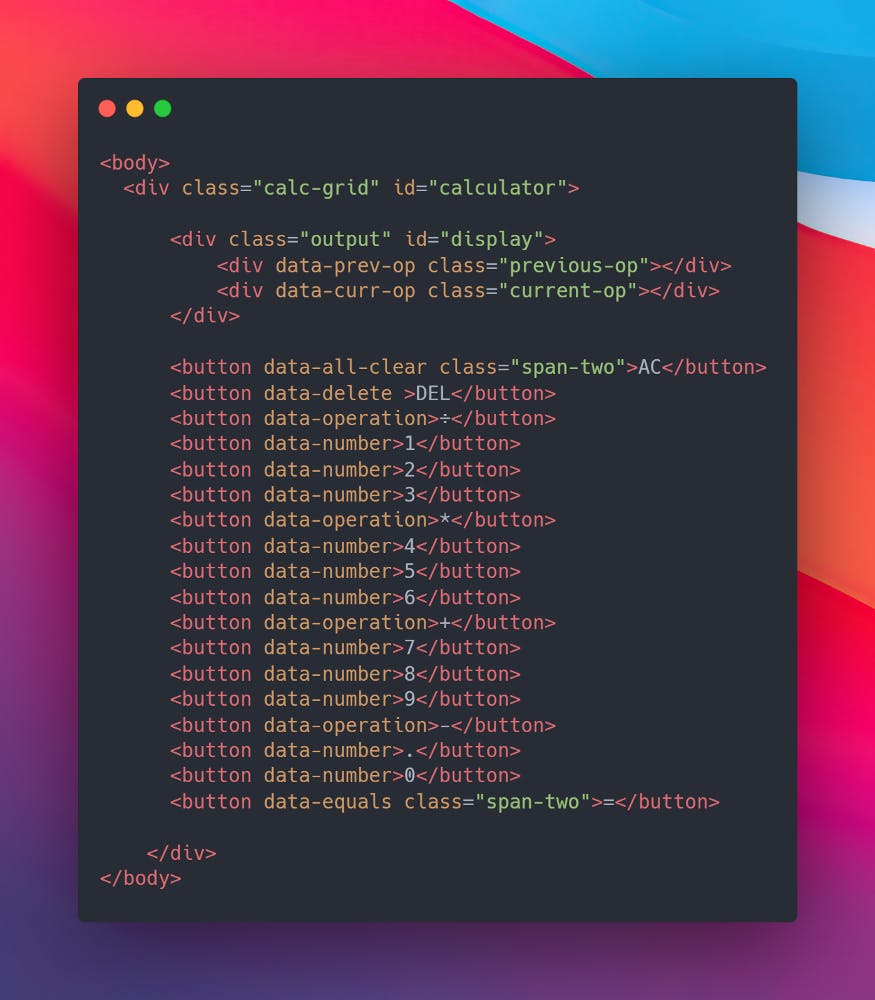
Let’s start with HTML -> I used data attributes in HTML as it is much more convenient! Don’t worry you could copy-paste the HTML code from the repo which I have linked to the end of this Blog.
You can checkout out the CSS from the source code that I have linked at the end of the Blog as our main focus is the logic for the calculator in JavaScript!
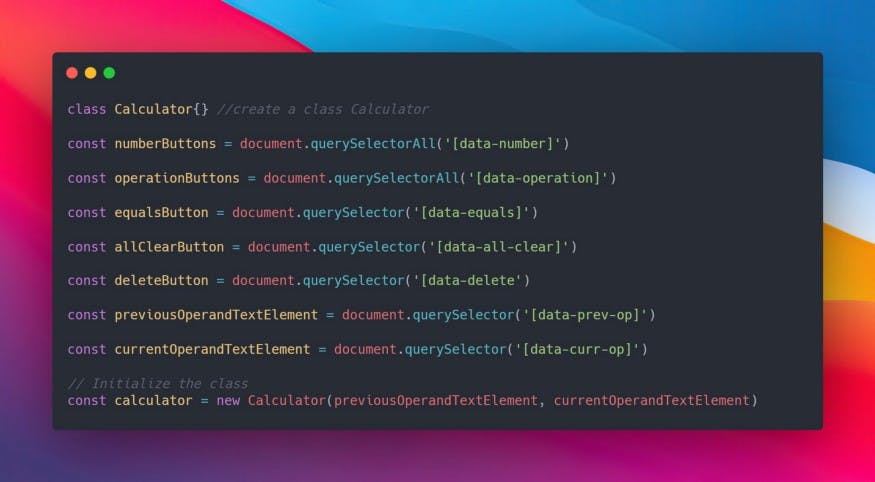
First things first, we will create a class Calculator and then select all the elements with data attributes using DOM and Initialize the class Calculator.
Create all the functions that the calculator class could perform and write them down, don’t worry we will fill in the logic next!

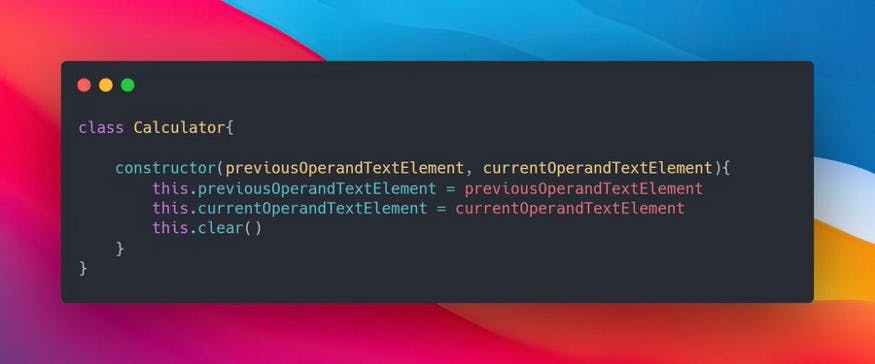
The constructor takes two parameters which are the inputs i.e. previousOperandTextElement and currentOperandTextElement and we call the clear function to clear all the previous calculations when a new calculator is called.
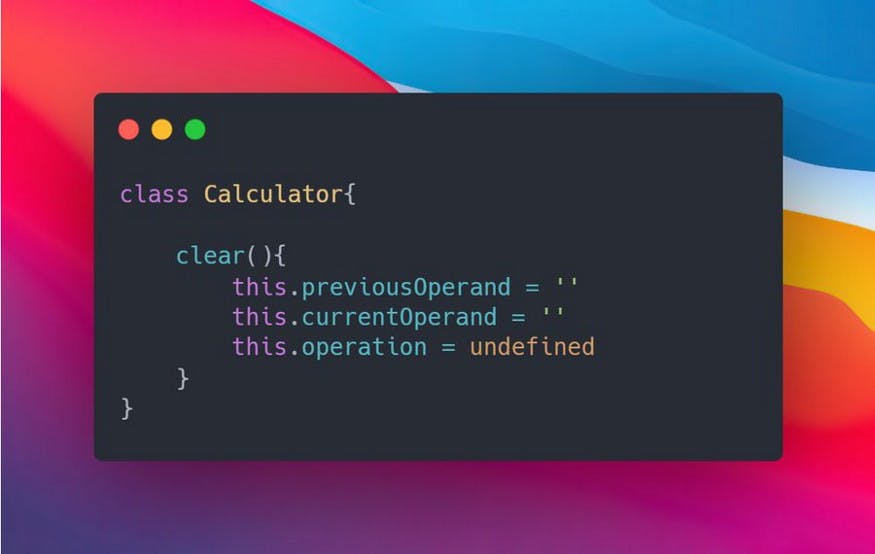
The clear method is used to clear the entire output screen. For this, we just need to set the currentOperand and previousOperand to empty strings and operation to undefined and it will clear everything.
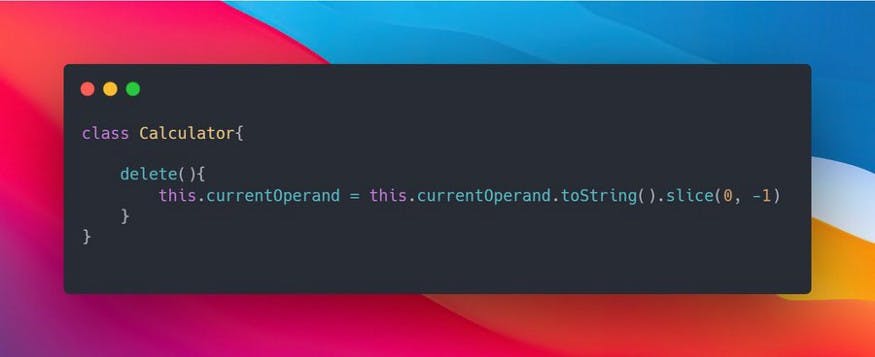
The delete method is used to remove the last entered number in the currentOperand. To do this we just need to convert the currentOperand to a string and then slice the last element from the string.
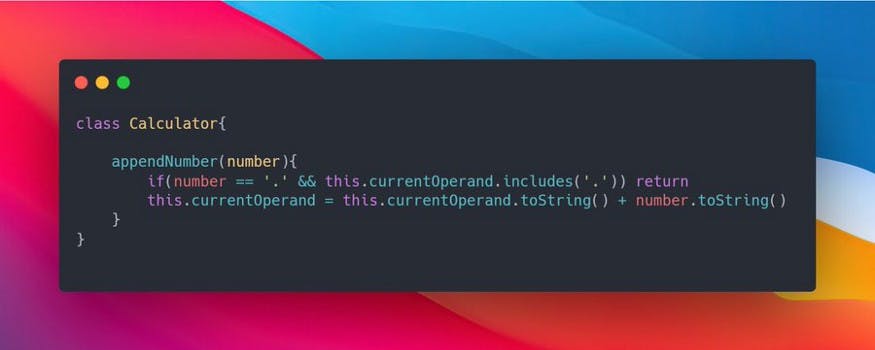
The appendNumber method is used to append a number at the end. It takes a number as an argument and converts it to a string and appends the pressed number to the end. Also, we need to check if the ‘.’ already exists so that we stop the function and don’t append any further.
The chooseOperation method is used to append operation at the end and then compute if something already exists in previousOperand. It also shifts currentOperand to previousOperand so that it goes on the upper part of the display. Also, check If the currentOperand is an empty string, and if it is then just return and if the previousOperand is not null compute the arithmetic and then shift it with currentOperand.

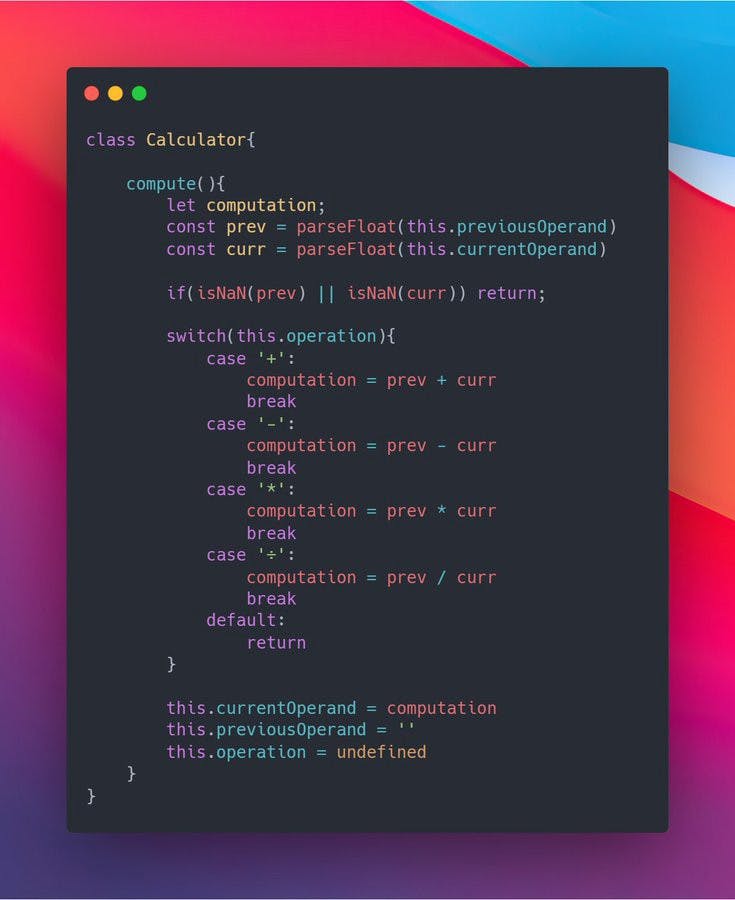
The compute method stores the result of the computation. For this we need to convert string to a number first, then check if the previousOperand and currentOperand exist or else return, then use the switch statements to create the logic for the calculator. Then you need to change the currentOperand to computation to show the result of the arithmetic and also update the previousOperand to empty strings and operation to undefined!
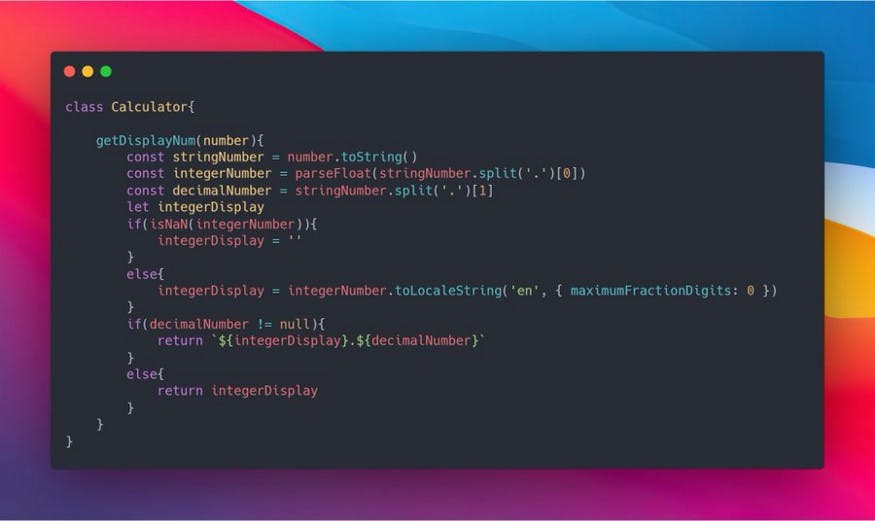
The getDisplayNum is used to display the number in a better and more attractive way. The function splits the decimal number from the ‘.’ and then updates the way in which the integer number before ‘.’ is displayed ex: It will display 355555.23 as 3,55,555.23 which looks better.
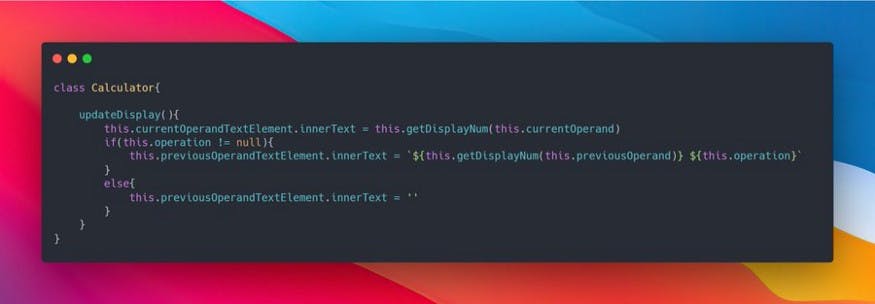
The updateDisplay is used to display numbers in the FrontEnd. In this, we change the innerText of currentOperandTextElement and previousOperandsTextElement to the currentOperand and previousOperand after calculation. Look at the snippet below to understand better.
Now let’s add EventListeners to the buttons!
As we used querySelectorAll to select the numbers and operation button, we need to use forEach for looping through all the buttons and addEventListeners to it, check the snippet to understand more!
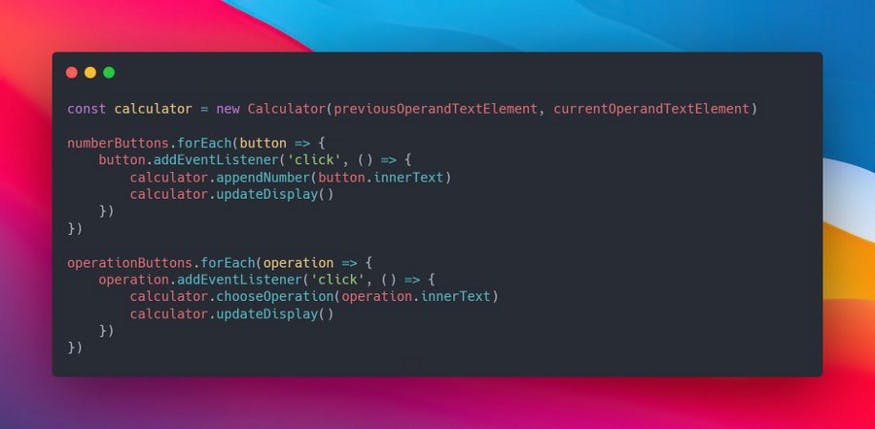
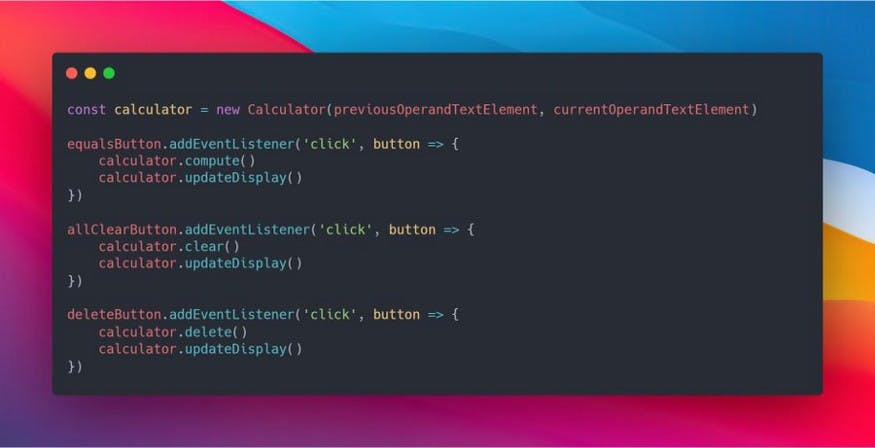
And in the end, we need to addEventListeners to the equalsButton, allClearButton, and deleteButton also don’t forget to updateDisplay!
The rest of the snippet is self-explanatory, dm me if you are facing any issues, I would be more than happy to help you out!
Congratulations, You’re all done now just host your website, share it on Twitter, and don’t forget to tag me @Deveshb15 I would love to see what you came up with!
Here’s the link to the repo: https://github.com/Deveshb15/Calc
Link to the live site: https://deveshb15.github.io/Calc
Hope you liked the blog, thank you so much if you read this far!🙌